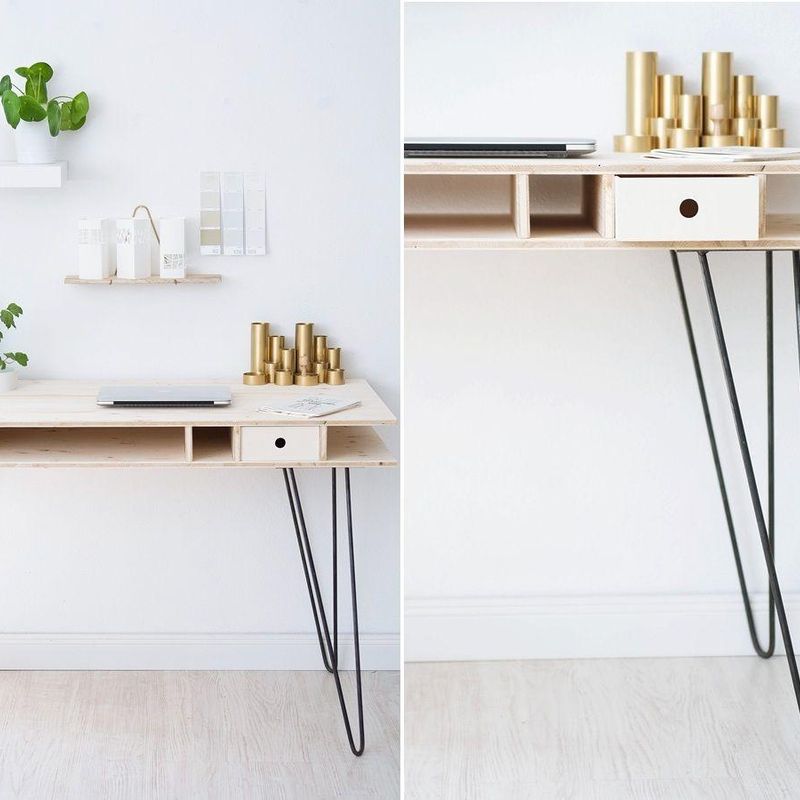
Stylish Table - One more creative idea!
<p>Sometimes it’s hard to find and choose the furniture that would perfectly suit to the style of your interior, to the necessary sizes and that would be functional. Well, then why not to make furniture by yourself? Today I’m going to show you how to make an unusual and beautiful table with your own hands. This table will be very compact, comfortable and it will provide a place for storing all kinds of little things there.</p>
<p>You’ll need:</p>
<p>- a plank of quality wood 25 × 200 × 250 mm, 4 pcs.</p>
<p>- plugs for holes for countersunk screws, 1 pack</p>
<p>- mordant</p>
<p>- paint</p>
<p>- joiner's glue</p>
<p>- a table circular saw</p>
<p>- a miter saw</p>
<p>- a hand circular saw</p>
<p>- a grinder</p>
<p>- a device for mounting countersunk screws </p>
<p>- a drill</p>
<p>- an elbow</p>
<p>- a ruler</p>
<p>- a clamp</p>
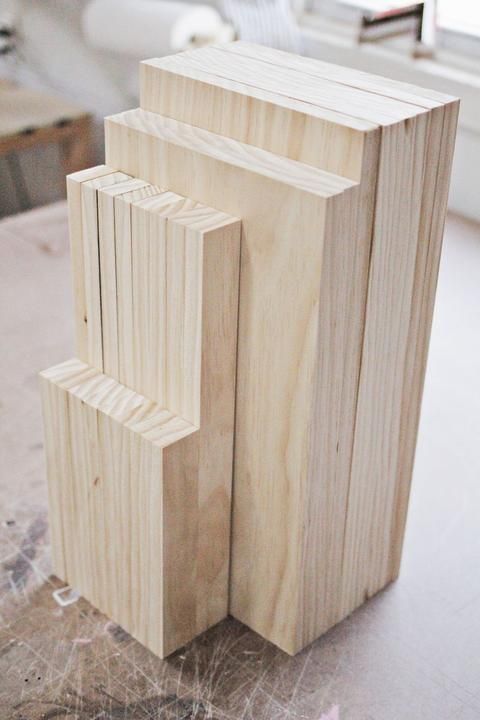
<p>Prepare the details and saw a plank into parts of the following sizes:</p>
<p>22.5 × 45 cm (6 pcs.)</p>
<p>22.5 × 41 cm (2 pcs.)</p>
<p>20 × 4 cm (8 pcs.)</p>
<p>40 × 4 cm (8 pcs.)</p><figure><a class="images-link" data-lightbox="gallery" href="https://abbigli.com/thumbs/8aHu0haGYxbjIspeprMwn05Y0fI=/b74848f3f99f4f508996d03e6d05f1e0" rel="nofollow"><img data-image="34335" src="https://abbigli.com/thumbs/unsafe/fit-in/1000x0/https://abbigli.com/thumbs/8aHu0haGYxbjIspeprMwn05Y0fI=/b74848f3f99f4f508996d03e6d05f1e0"></a></figure>
<p>Glue the planks pairwise 20 × 4 × 40 cm and 4 cm together, secure them with clamps until the glue dries. Using these details we will make table legs. </p><figure><a class="images-link" data-lightbox="gallery" href="https://abbigli.com/thumbs/vkvQ6qJUBotu-JNwsG6Y2qky6LA=/f2e707d5e1dd44c882cd2f7df0f9b19c" rel="nofollow"><img data-image="34337" src="https://abbigli.com/thumbs/unsafe/fit-in/1000x0/https://abbigli.com/thumbs/vkvQ6qJUBotu-JNwsG6Y2qky6LA=/f2e707d5e1dd44c882cd2f7df0f9b19c"></a></figure><p>While the legs are drying, you can proceed to making a box – using four plates 22.5 × 45 cm and two tablets 22.5 × 41 cm. You can use wood glue and a hot glue gun for gluing the parts together. </p><figure><a class="images-link" data-lightbox="gallery" href="https://abbigli.com/thumbs/0FHYRQVDhlRtQ5_bsB2DpRHHVaI=/7c2b77575530474bb4d8c9693f61a030" rel="nofollow"><img data-image="34338" src="https://abbigli.com/thumbs/unsafe/fit-in/1000x0/https://abbigli.com/thumbs/0FHYRQVDhlRtQ5_bsB2DpRHHVaI=/7c2b77575530474bb4d8c9693f61a030"></a></figure><p>Then make the table legs, gluing the boards of the length of 20 cm together and fix them with the help of countersunk screws. Set the crossbars of the length of 40 cm between the legs at the bottom. Close all holes for the countersunk screws with plugs. </p><figure><a class="images-link" data-lightbox="gallery" href="https://abbigli.com/thumbs/RxofTyu9DpbL1L8YktaHu5uUZZg=/a9d2de2350594c70b75979b22ca6b1b3" rel="nofollow"><img data-image="34339" src="https://abbigli.com/thumbs/unsafe/fit-in/1000x0/https://abbigli.com/thumbs/RxofTyu9DpbL1L8YktaHu5uUZZg=/a9d2de2350594c70b75979b22ca6b1b3"></a></figure><p>Make a lid from 2 planks 22.5 × 45 cm. After the glue dries, you need to cut a blanket by diagonal. </p><figure><a class="images-link" data-lightbox="gallery" href="https://abbigli.com/thumbs/Zg26Hy7J2Ccq4TDDN7YKRKUzCIU=/b6ff2f51e90946fab3c2e70144860aea" rel="nofollow"><img data-image="34340" src="https://abbigli.com/thumbs/unsafe/fit-in/1000x0/https://abbigli.com/thumbs/Zg26Hy7J2Ccq4TDDN7YKRKUzCIU=/b6ff2f51e90946fab3c2e70144860aea"></a></figure><p>Fix one of the triangular parts onto the box with screws. Attach a couple of short battens to the lower part of the second triangle, so that you could firmly fix this part of the worktop on the top of the box.</p><figure><a class="images-link" data-lightbox="gallery" href="https://abbigli.com/thumbs/7JiFRGRpNX09B8mFRn91pD8v6yI=/4b8a08bc527445d5988a9f1c750ebcf8" rel="nofollow"><img data-image="34341" src="https://abbigli.com/thumbs/unsafe/fit-in/1000x0/https://abbigli.com/thumbs/7JiFRGRpNX09B8mFRn91pD8v6yI=/4b8a08bc527445d5988a9f1c750ebcf8"></a></figure><p> File down all the parts with the help of a grinder. </p><figure><a class="images-link" data-lightbox="gallery" href="https://abbigli.com/thumbs/Y-CDMmz1NfuFjkpHXOQ6lw4v07A=/94bcb3febce241c6bf3be618e74b5bd4" rel="nofollow"><img data-image="34342" src="https://abbigli.com/thumbs/unsafe/fit-in/1000x0/https://abbigli.com/thumbs/Y-CDMmz1NfuFjkpHXOQ6lw4v07A=/94bcb3febce241c6bf3be618e74b5bd4"></a></figure><p>Paint your table or cover it with a stain and varnish. And that’s all – a creative table is ready! Good luck! </p><figure><a class="images-link" data-lightbox="gallery" href="https://abbigli.com/thumbs/NJLWQCNOF89nWy3y4cv5sfo2lfI=/c066cabdac7c490094ad5ed14bb4d15a" rel="nofollow"><img data-image="34343" src="https://abbigli.com/thumbs/unsafe/fit-in/1000x0/https://abbigli.com/thumbs/NJLWQCNOF89nWy3y4cv5sfo2lfI=/c066cabdac7c490094ad5ed14bb4d15a"></a></figure><p>Thanks for the idea to <a href="http://www.abeautifulmess.com/2014/11/cubed-end-table.html" rel="nofollow">http://www.abeautifulmess.com/...</a></p>
Категория:Home