DIY Wall Pocket Organizers
<p>Hello!</p>
<p> Nowadays recycling has become a significant action to almost all of the people around the world. Save the planet they say! It is especially cool to those who do not like to throw thing away. </p>
<p> Today we are going to make absolutely cool and unique wall pocket organizer using empty lotion bottles. You may use a shampoo and bottles from the other cosmetics as well. It is a fun way to recycle thing and get something unusual from that.</p><figure><img src="https://abbigli.com/thumbs/vIGeJBShnuuk7A2uGr-m9cCwx6A=/099e14ed62564f659bd932919af6ef0b"></figure>
<p> Here is what you will need:<br>- Empty lotion bottles (as many as you want)<br>- Adhesive remover<br>- Rubbing alcohol<br>- Paper<br>- Scotch tape<br>- Permanent marker<br>- Craft knife or scissors<br>- Sand paper<br>- Wooden door knobs</p><figure><img src="https://abbigli.com/thumbs/SEtKk-X4TgRMi7eQzM85Aiqucfw=/b46c6475dc6d47109152779cb1a79ec3"></figure>
<p> Directions:</p>
<p> Peel off all of the labels on the bottle.</p><figure><img src="https://abbigli.com/thumbs/XShpHFt56YKIeetpmoCf2zw2tYI=/67e3e025ab124a7aae46db2128184508"></figure><p>Remove any sticky residue with an adhesive remover and wipe down the bottles with rubbing alcohol.</p><figure><img src="https://abbigli.com/thumbs/CiyzQ4N9lZWxy1J4LB-CQWxtPS8=/d99fddc3bb974a0cbd201c62e936b26b"></figure>
<p> Draw a template on paper to fit your bottle. Cut out the template, wrap it around the bottle, tape it in place, and trace it onto the bottle with permanent marker. The front side of my template is about 3 inches tall and the back side where the hanger is about 5.5 inches tall. The circular opening for the hanger is 1.5″ in diameter, which I sized to match my knobs.</p><figure><img src="https://abbigli.com/thumbs/QjhdDo2RVABII5hAHUZ83FhQhG0=/1ab8ca86b0b04479ba6b796da16b3bc6"></figure>
<p> Use a craft knife to cut along the lines using a small, sawing motion with steady force. Go slowly! A curved craft knife might be easier, especially for cutting the curved portions of the tracing. For the circular portion, I found it easier to poke a hole in the center of it and insert very sharp scissors to cut out the circle from the center.</p><figure><img src="https://abbigli.com/thumbs/sFk06P8J5cSX9iS1SpLXqDDEtkw=/22465edb54884f61b2e62a66a8c318a1"></figure>
<p> Use sand paper to smooth out any jagged or rough edges if needed. You can also use scissors to even out edges, but be careful not to cut off too much. </p>
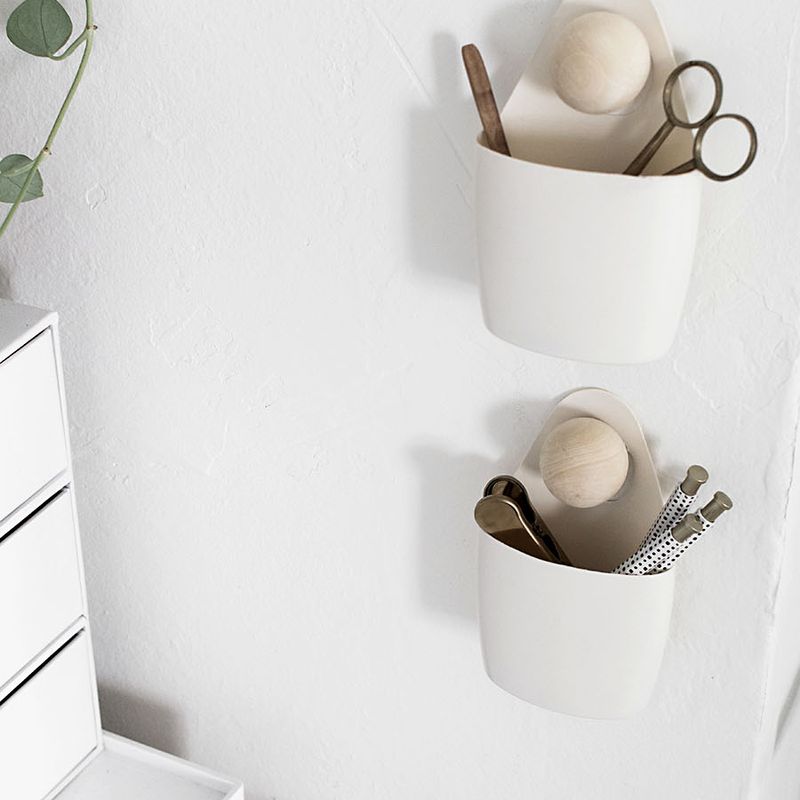
<p> Drill your knobs into the wall and hang up your organizers.</p><figure><img src="https://abbigli.com/thumbs/Vc53FOorGaWqiq-iwTSc_HkcCRc=/a6a543e1eb954225b9ae5ec0d68b0c75"></figure>
<p> And voila! Those are super cute and useful in every house. Don’t forget to recycle the excess plastic parts you cut off.</p><figure><img src="https://abbigli.com/thumbs/aYs60XWab1po83YZU87M6U8o0KY=/4d99949195b146d9820d4d42d3935bcd"></figure>
<figure><img src="https://abbigli.com/thumbs/GCl3Ij7oKM0cF2avXBa8aB6IFoU=/4a7872dd91364b059735cb2b4bd8681e"></figure><p> Source: <a href="http://www.homeyohmy.com">homeyohmy.com</a></p>
Категория:Home